
 |
News |  |
Tutorials | |
Projects | |
Reviews | |
Authors | |
Contact | |
Search | |
Links |  |
|
Admin | |

Carbon Rod : Creating The Rod
Ok, now let's get down to business....
1. Start with a new image in RGB mode. We'll make this one 300x80px, but you can use any size you like, depending on how big yoru rod needs to be.
2. Create a new layer by clicking the new layer button in the Layer pallet or by selecting New - Layer from the Layers menu.
3. Select the rectangular marquee tool, and in the tool options, set the style to Fixed Size. Set the Width to 15px and the height to 40px. Now click on the left sideof the new layer.
4. Hit G to select the gradient tool, and select the Linear Gradient as the gradient type, and then choose the silver gradient in the options menu. Fill the selection from top to bottom with this gradient.
5. Hold shift and hit the down arrow key 2 times to move the selectin down 20px.
6. Go to Image - Adjust - Brightness/Contrast. Set the brightness to -55 and the contrast to +10.
7. Go to Edit - Transform - Sacle and scale the selection vertically by 50%

8. Hold Ctrl+Alt and hit the right arrow key to duplicate this layer. Now move it to the right side of the canvas and hit Ctrl+e to merge it with the one below it.
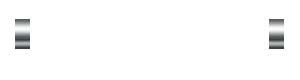
9. Hit m to go back to the rectangular marquee tool. Now go up to the options and change the style to Normal.
10. Select the area between the two ends as shown below.
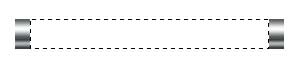
11. Go to Edit - Fill - Pattern and select the carbon pattern that we made earlier.
12. Now go to Filter - Distort - Sphereize and use the values of 100 and Vertical Only.
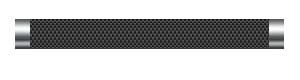
13. Alright, now we're almost done, we just need to add a little hilight to our rod. So, let's go to Select - Modify - Contract and enter a value of 2.
14. Now hit Ctrl+Alt+D to feather the selection. Enter an amount of 2.
15. Create a new layer. Hit D to set colors to default, then X to invert them.
16. Now go back to the gradient tool. Select the gradient option "Foreground to Transparent" and we'll keep the linear gradient for the gradient type.
17. Starting at the top of the selection, click on the image and hold down the mouse button. Hold down the shift key and move the mouse down about 6 or 7 pixels, making a thin strip with the gradient tool along the top of the rod.
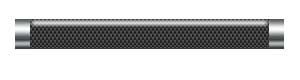
18. Hit Ctrl D to deselect the layer. Now, hold down Ctrl and hit the down arrow key 3 times to move the layer down 3 pixels.
19. Finally, set the layer mdoe to Overlay.
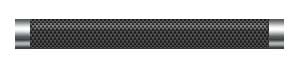
There you have it, One finished carbon rod!
I hope you enjoyed this tutorial and that it was helpful. :)
- Kelli
Author: Kelli
Last edited on: 6th Dec, 6:55 am
Please
rate this article.

tutorial Pages
